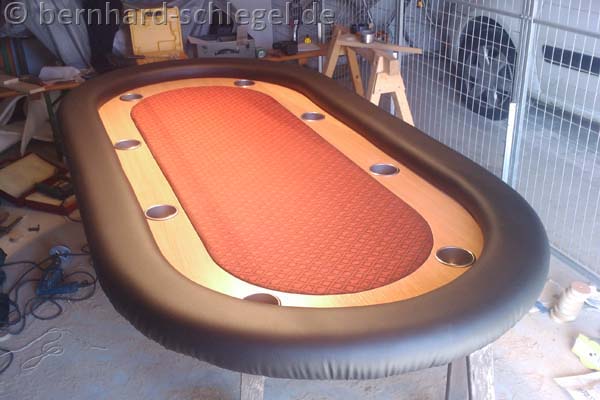
You want to build your own poker table and are looking for instructions? In the following I will explain step by step which materials and tools you need, how to build your racerack and rail and what else you need to know.
If you like the instructions, I would be very happy about a short comment :) Let's go!
Preparations
First of all, you should have all the things you are likely to need ready - so that you don't get stuck during the crafting process or even fail to complete the project.
Very important: If you don't understand something or if you think it is not clearly formulated, please don't hesitate to use the comment function - you are certainly not alone with your question!
First, this is what you'll need material-wise
Materials
- 1 wooden plate, 200cmx 100cm x 18mm with grained surfaces (for raceway, thickness you can choose freely)
- 1 wooden board, 200cmx 100cm x 24mm, MDF (lower board, rail, later hidden, thickness you can choose freely)
- Foam for the rail, about 240cm x 140cm x 2cm (so you still have a little air). Material PU RG35/55
- Foam for the playing field, 180cm x 56cm (min), thickness: 2-5mm. RG35/55.
- Playing field cover: Adjust to the dimensions of the playing field - Remember: You still have to be able to fold the thing down and staple it! In our case: 220cm x 90 cm (approx.)
- Cupholder, 8 pieces, hole diameter should be min. 80mm, so that the inner diameter of the cupholder is about 78mm - so that not only the 0,33 bottles fit in (otherwise you have to rely on BECKS)! Here for example the ones with 10cm diameter.
- table legs - here you are completely free. E.g. on Amazon for 4 pieces 10€. At IKEA you can get for example "Vika Curry", for a total of 12€
- Lots of screws, depending on the thickness of your 2 wooden plates
- Lots of staples for the stapler (the wider, the better, then a tearing of the leather is less likely. You have to choose the length of your staple ammunition so that the staples neither penetrate the material to be fixed (game cover, leather) nor stick out 4mm - depending on the stapler power)
- The imitation leather cover for the rail is available here or here. My leather cover had an initial size of 140x300cm at about 900g per running meter.
- spray glue to glue the foam or several layers together.
Required tools
- Jigsaw (It is best to buy a new blade, as rigid as possible)
- cordless screwdriver (screwing, drilling)
- Drill (drilling/grinding the cup holder holes (much torque needed), cordless screwdriver not enough power)
- sanding machine (to round the sawn edges a little bit, I had a belt sander, but here you can take everything that sand)
- Lots of screws, depending on the thickness of your 2 wooden plates
- Electric Tacker (For play cover and the leather of the rail. Look at how often I stapled: That's how often you should staple - that's why: clear recommendation to buy an electric stapler). Maximum staple width for this tacker is 10mm (so e.g. the here)
- Hole saws for the cup holders (since you probably won't find exactly the size you need for your cup holders, you will need an additional ...)
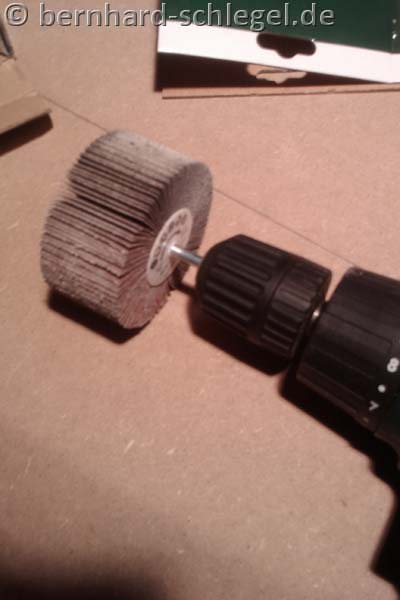
- Fan grinders (... you will need them to get the holes to size - more about this later! Here e.g. with 80mm - must fit to your cupholders)
- Clamps (again and again you will align 2 parts to each other, clamp and screw them together)
Also ...
- Space (Moms garage)
- 3 sawbucks (2 are too few when building the rail)
Side note: I have intentionally refrained from using glue. I like more form-fit - lifts at least as well, and if you ever need to change a special part, separating two parts joined with screws is much easier than separating two glued parts.
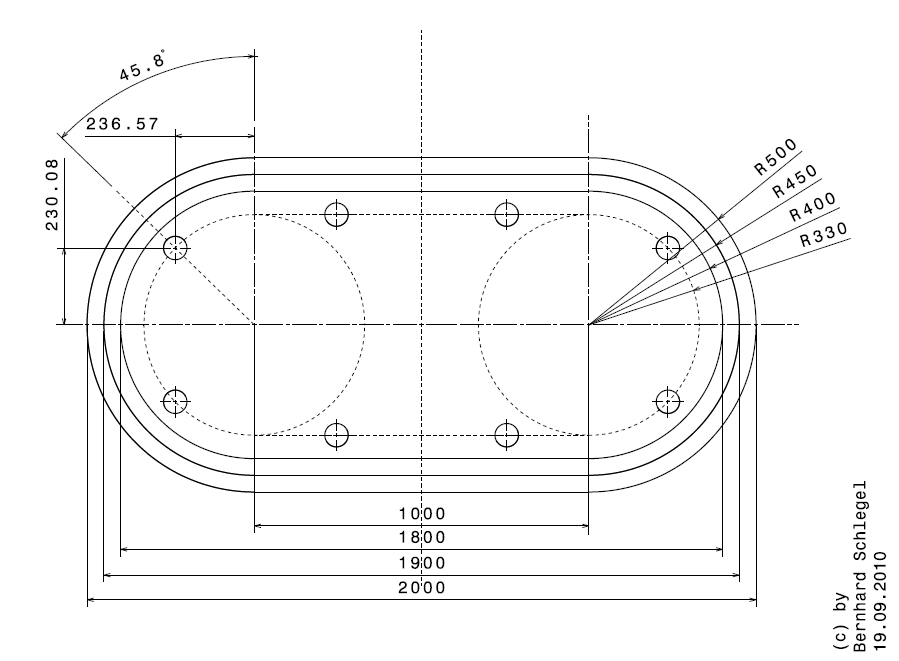
Step 1: Marking
Unfortunately, clamping the saw in constructions so that it saws where it should, did not lead to success with me - maybe because the blade was not sufficiently rigid.
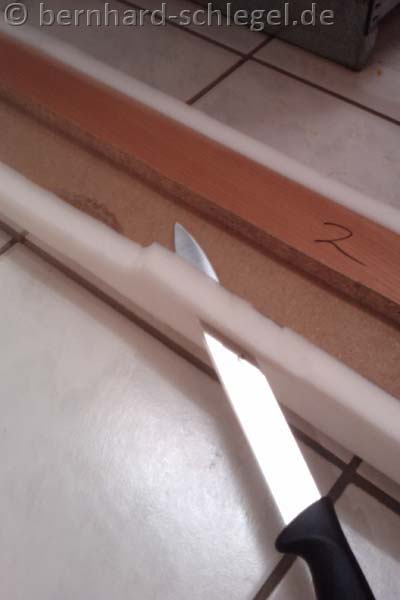
My recommendation: Draw, and then try to saw along the line. Don't worry if the saw runs off a bit - the only cut that really matters (and that you will see later) is (see below) the one between the railway and the playing field. So do it last and gain experience before you do it.
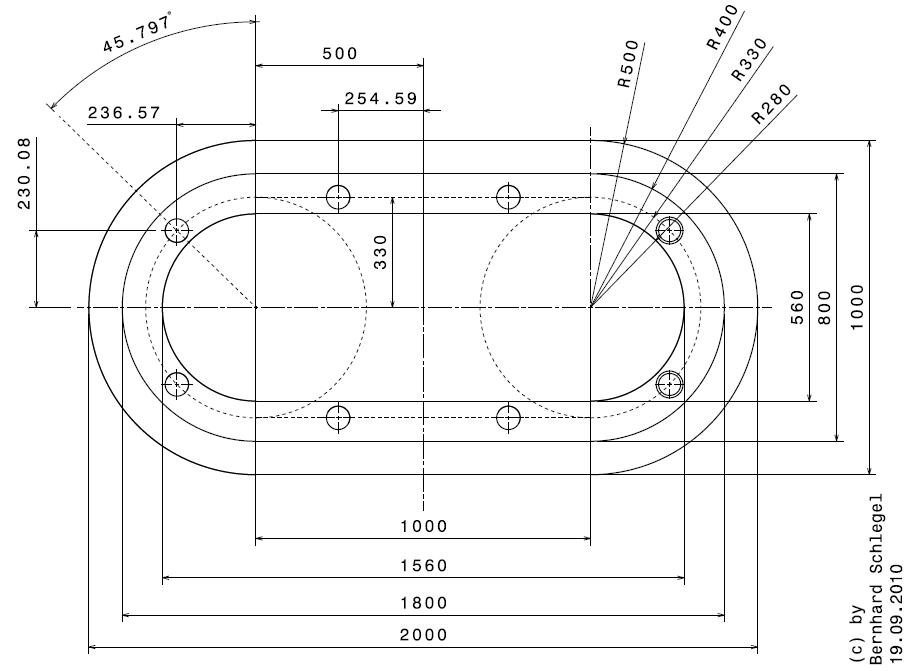
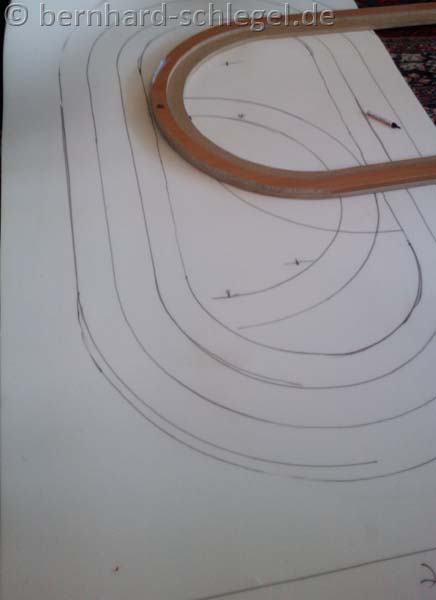
To draw the circles at the ends, I drilled a hole in the center of each circle (you won't see it later) and then worked with the following "device":
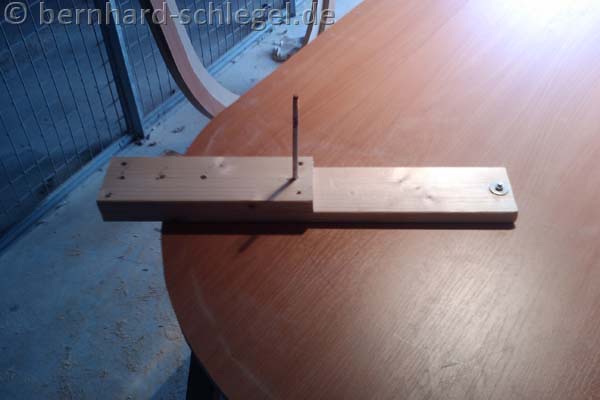

In principle, it is a board fixed centrally with a screw into which you can insert a pencil. ("Board-with-insertion device").
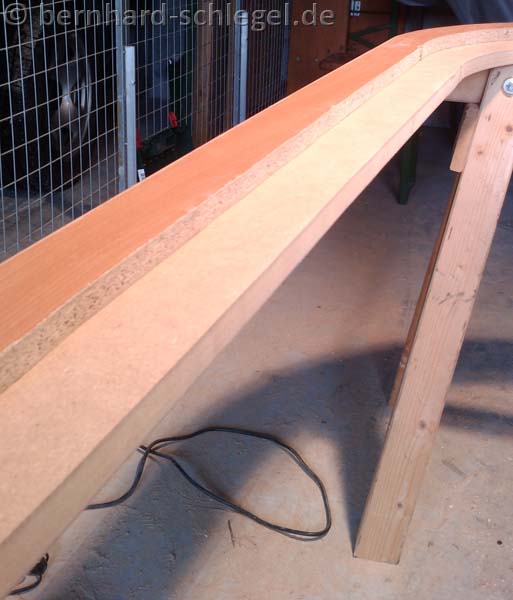
Step 2: Sawing
Now it's getting serious:
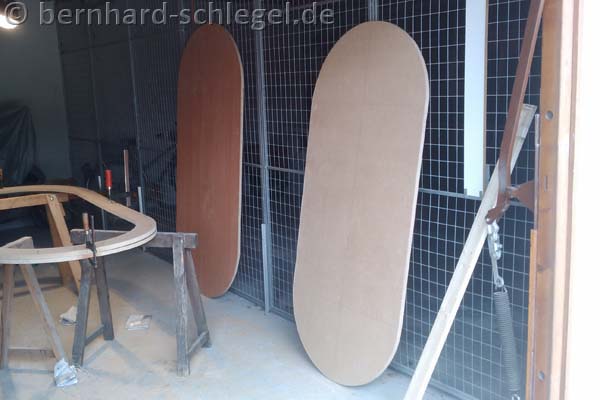
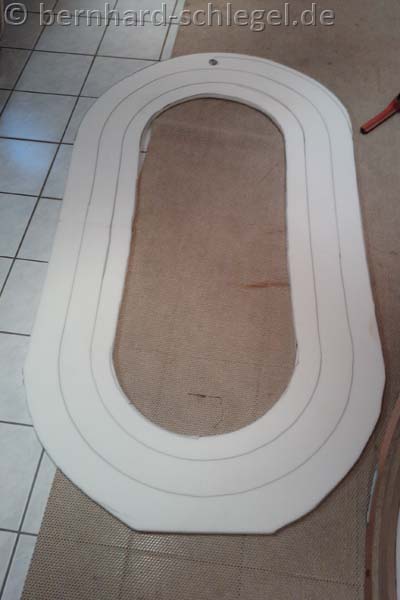
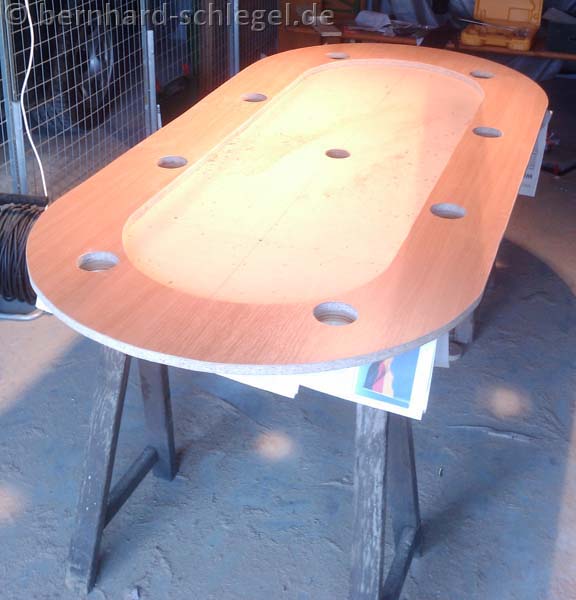
From the MDF board the upper part of the rail and the base plate (here the feet are screwed on later) are sawn.
The lower (outer) part of the rail, the racetrack (where the cup holders will later be placed) and the playing field are cut from the wood grain panel.
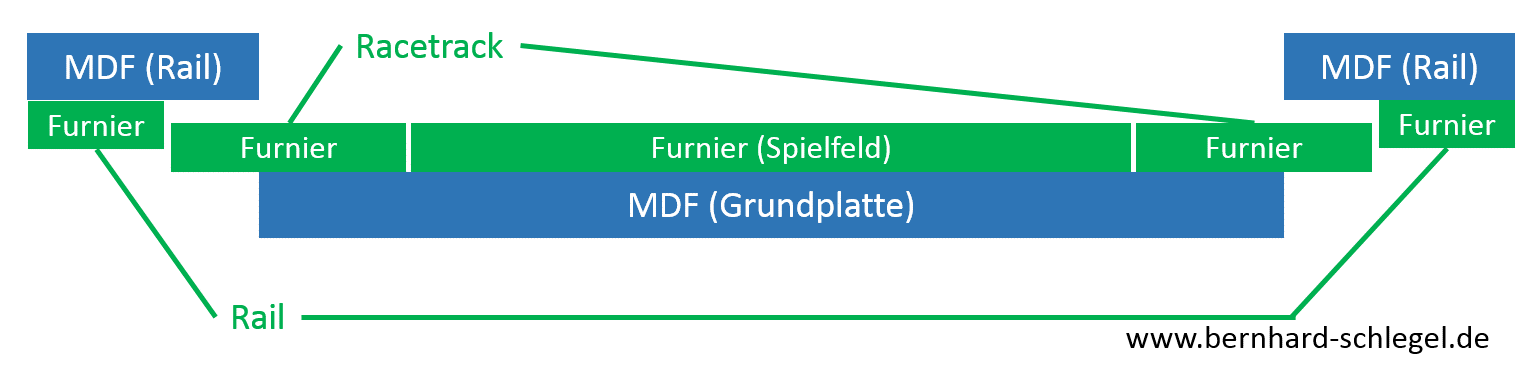
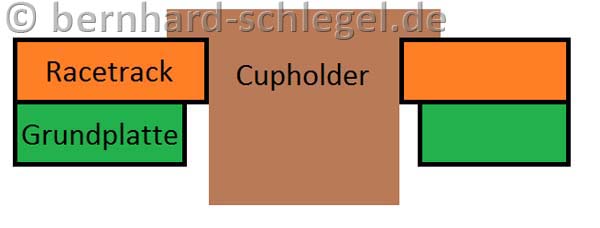
So that you know where to saw (and where there are only visible edges on the construction drawings) here is also a cross-section through the table:
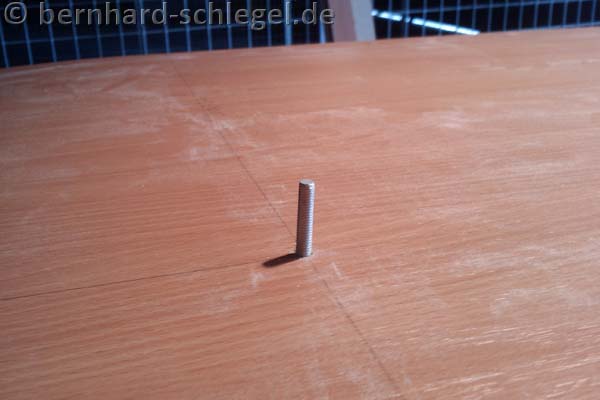
Since you need a starting point for sawing with the jigsaw, it is best to drill 2-3 holes as small as possible with a drill bit to create a kind of slit. Here you can start with the jigsaw. The smaller the holes, the better.
It is best to make a few test drillings on the sawdust - or if there is none yet on the corners. When sawing, remember that the only cut that will really be visible later on (i.e. not covered by foam, leather or anything else) is the inner cut on the wood panel with grain - so be extremely careful here! This "important" cut is the one between the racetrack and the pitch.
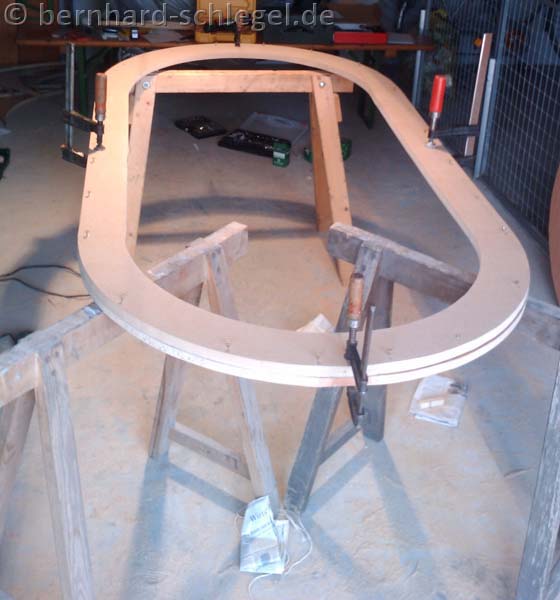
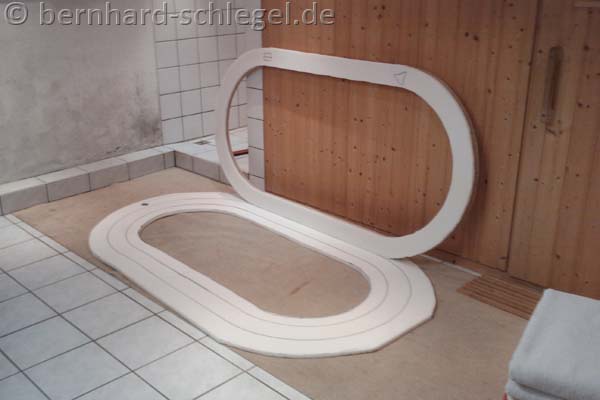
Step 3: Rail assembly
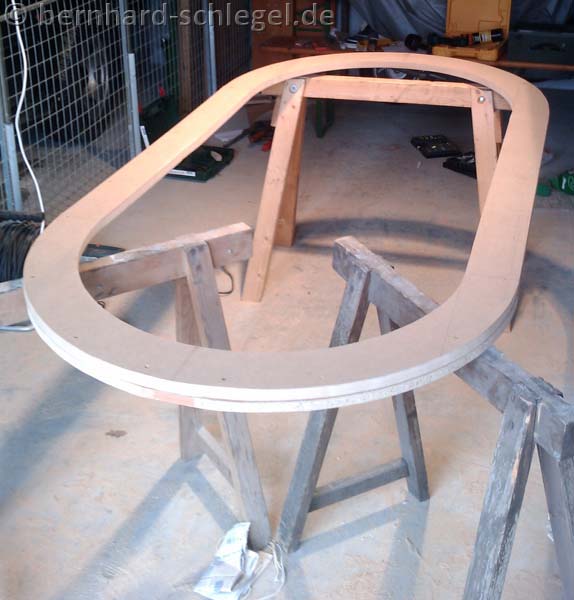
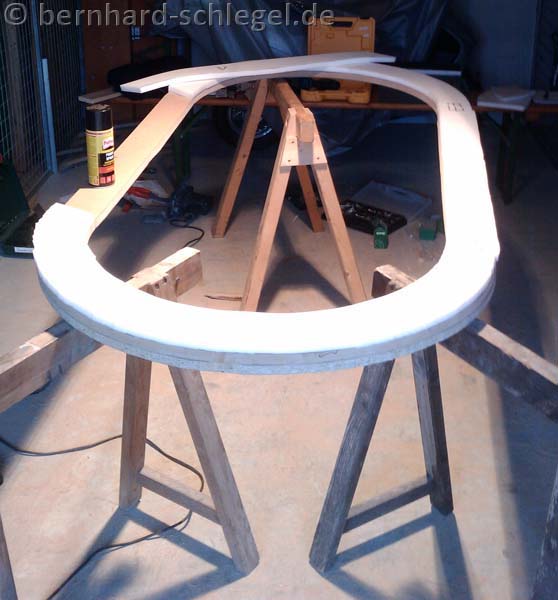
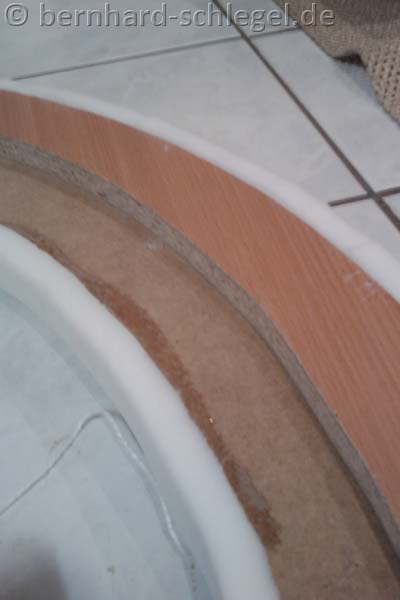
First you put the upper and lower part of the rail on top of each other and fix it with at least 4 clamps to prevent it from slipping. But make sure that both parts are aligned with each other without tension. Then screw it tight.
Since the screws do not have to transmit a lot of force here, you need not exaggerate: 20 screws distributed around the circumference should be enough! But make sure - as before - that the screws are just long enough so that they don't pierce but have as much material as possible to bite through.
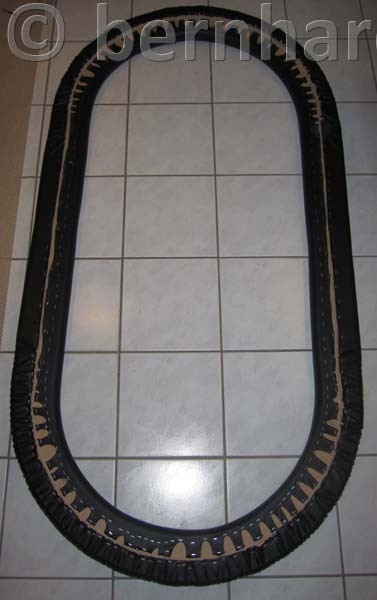
Step 4: Upholstering the rail
This is the most difficult and extensive step in building a poker table.
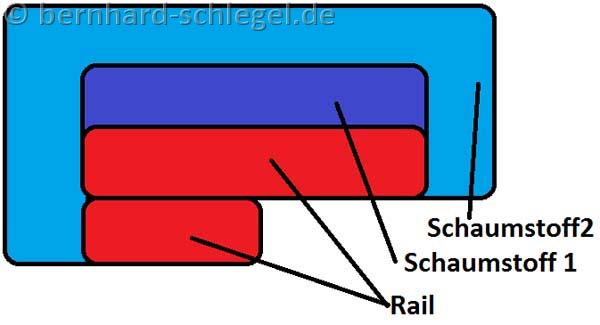
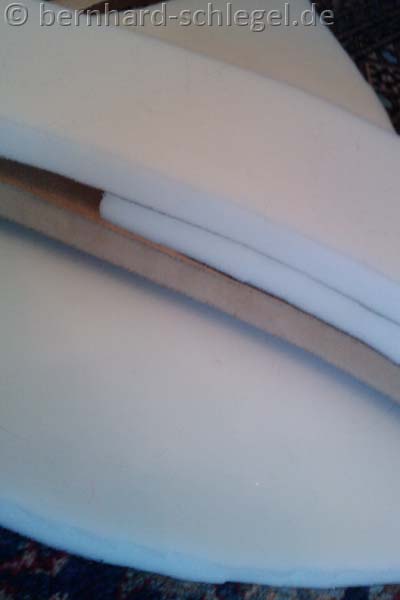
Schaustoff (on top of the shelf) were too little, and 4 cm at the side too much, I could not get around 2 layers, my construction was, like in this sketch or in this picture.
How exactly does the upholstery work now? The following steps:
-
put your finished rail on your foam Draw with felt-tip pen where you want to cut later. Make sure to leave some space next to the rail itself (at foam2) - after all, you want to fold the foam later. I recommend 10 cm here. If you don't have enough foam - or if you are a Swabian (like me) and therefore want to make the best use of the raw material - to cut out all parts in one piece, i.e. if you have to split one of the 2 ovals, the smaller one (in sketch no. 1) should be the best! Just to make sure that we mean the same here: The smaller one is the "inner" or "lower" foam layer, which will later be covered by the second layer.
- Cut out your "stencils" with normal scissors. Make sure that the upper foam layer (in sketch no. 2) is in one piece, with foam layer 1 it doesn't matter.
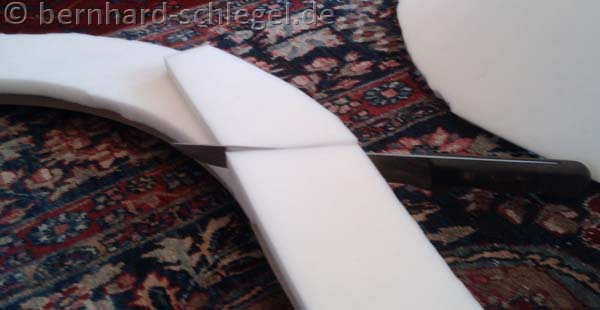
- this step is only necessary if you could not cut out a layer in one piece. Procedure: Put the pieces on your rail as they will be glued together later (so that they overlap). Now take a sharp knife and cut (at once while they are lying on top of each other) through the overlapping foam pieces (if possible at a slight angle) and clearly mark the pieces with patterns - and also their alignment to each other) so that you can put them back together again later.
-
now spray the top of the rail properly with spray glue if you have several parts, always only the necessary part. Let the glue dry for a short time (20 sec.) and then press the first foam layer (layer 1) all around the rail.
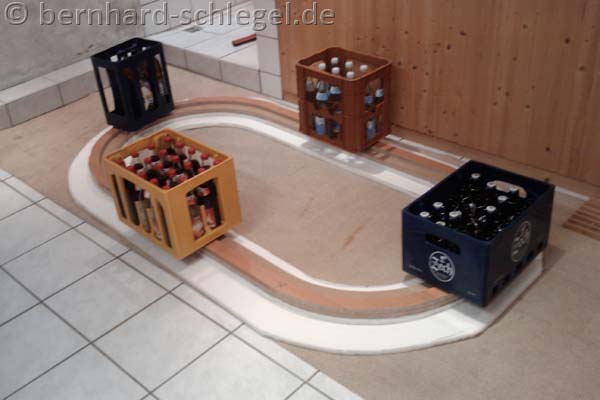
- now comes foam layer 2 - here it gets a bit more complicated. Procedure: Lay the foam oval (layer 2) on the floor. Move the bottom side (where the glue will be applied later) to the top. Then place the rail with the 1st layer already glued on the oval and align it. Now comes the trick: Just tilt the rail away again and lean it against a wall nearby. Now you can spray the bottom of foam layer 2 and the top of foam layer 1 and then simply tilt the whole rail (including foam layer 1) down again - it is immediately perfectly aligned. The best thing to do now is to weigh down the construction with some beverage crates and let the glue dry.
- now the foam only needs to be folded down and glued to the side of the rail. The best way to do this is to put some cords (at the curves) under the rail (foam at the bottom, wood points upwards) and to provide some beverage crates for the long sides again. Now you work your way through it section by section: Spraying, folding, fixing (in the curve with the string, long side through the crates).
- now cut off the remaining foam with a sharp knife
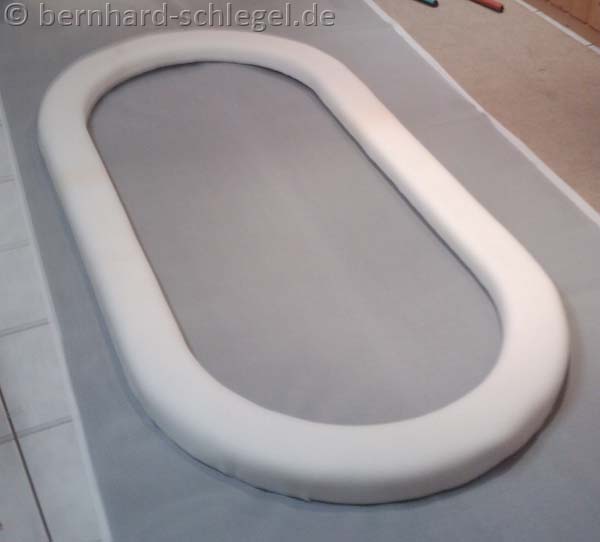
- Done!
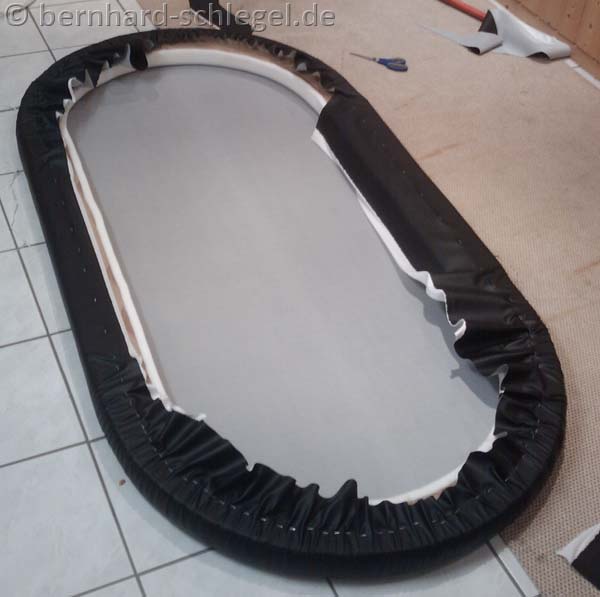
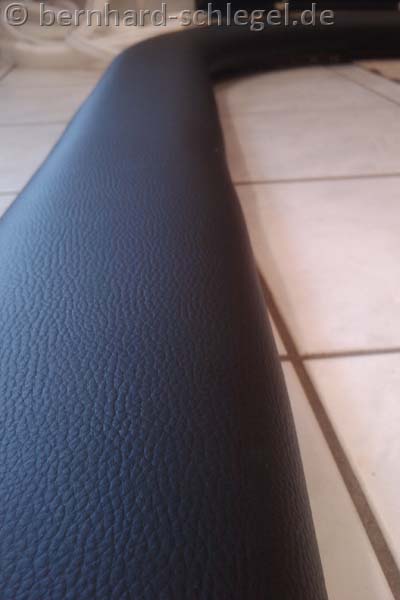
Step 5: Covering the rail with leather
If you can't do it without wrinkles, don't worry. With two layers of foam this is (in my opinion) almost impossible. Besides, when you play later on, you will only see the inside of the rail in 99% of the cases anyway. For this step, I also strongly advise you to get a second man/woman who shares your enthusiasm for poker - it makes it a lot easier: Let's get started:
-
spread your leather trim on the floor and place the rail on top of it.
- cut a 4-corner on the outside with enough space around the rail and a 4-corner on the inside (again with enough space on the long sides, but don't cut the curves here, see picture). Pull and staple like a madman - from the middle to the outside! For details on the stapling order, please see the picture. On the outside you have to pull like the crazy ones, so that there are as few folds as possible later.

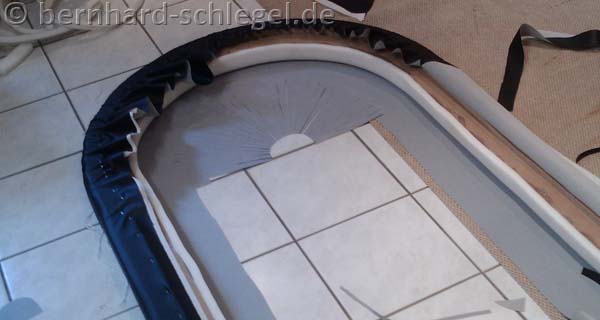
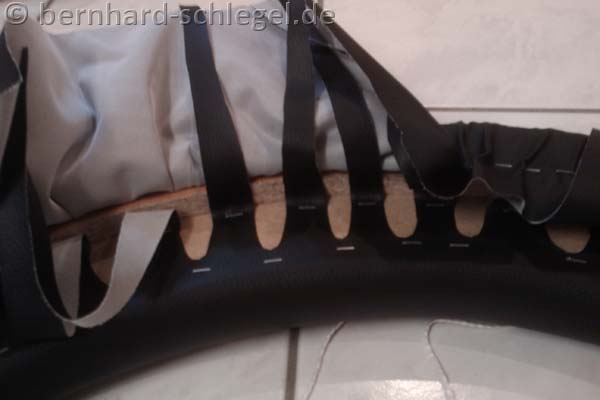
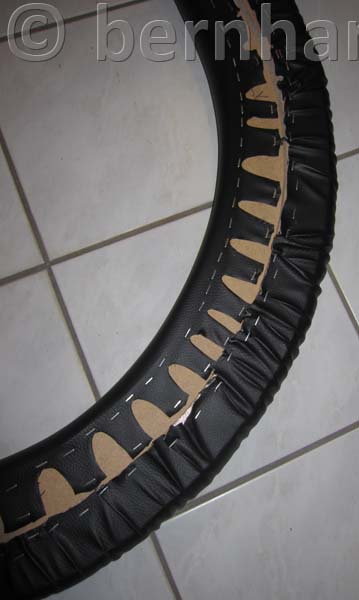
- in the curves you now cut from the center of the circle in the direction of the rail (radial, see picture) Make sure you leave enough space for it! The leather should still be about 1cm "uncut" on the back of the rail when tacked.
- You start in the middle: pull, staple, pull, [...] - in the same order as you did on the outside. It's best to find someone to help you - this really makes it easier. On the inside you have to take care that the leather does not tear.
- Ready!
Step 6: The gaming board
The most difficult part is now behind you - unlike the rail, the playing field is a cinch:
-
place the board the wrong way round on the foam (now the thinner one) Draw the template with a felt-tip pen - you know it already. But don't leave any space here - draw directly on the edge! Afterwards, simply fold up the board - this way your alignment is maintained.
-
but do not cut now! Instead, spray the area just marked on the foam and the top of the wooden plate with glue, and then fold the plate back down.
- let it dry for a short time, cut along the edge with a sharp knife (preferably one from mother's kitchen, which she has never used herself (at this point, apologize to my mother for deflowering her knife) along the edge (this time without leaving any space).

-
now spread out the field cover (top to bottom) and place the field board with the foam (foam to bottom) on top. Again roughly, with a few centimeters of air (about 10cm, you will have plenty of space just like me) cut it all around.
- fold over, staple. If there are folds: If there are wrinkles: Nothing helps; reopen the responsible staples and staple again.


- Ready.
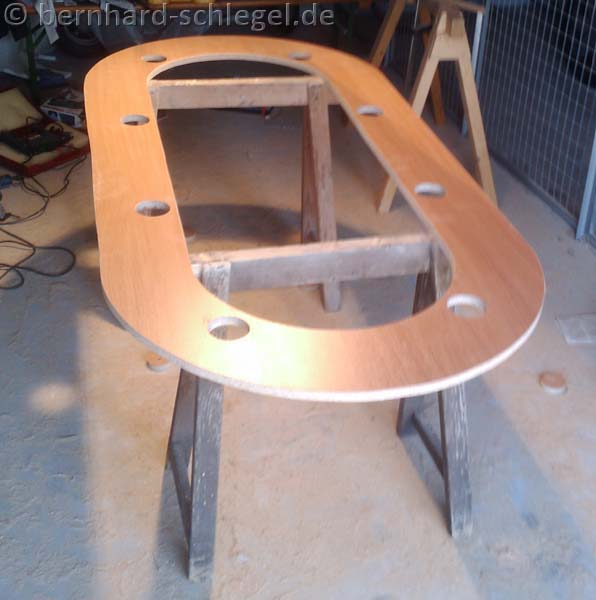
Step 7. Racetrack and table legs
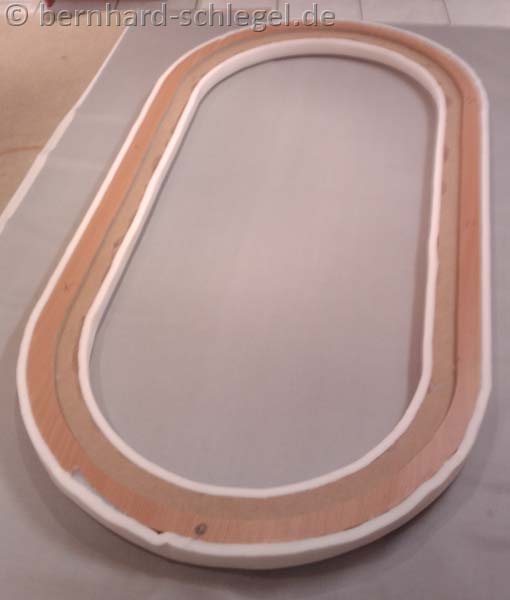
Let's recap: You already have a padded rail and a ready-covered playing field. Now the only thing missing is the component that holds everything together!
-
as always: Align the racetrack and table base cleanly to each other and fix it with clamps to avoid slipping. Take care not to scratch the wooden plate of the racetrack when handling it (put a newspaper underneath, etc.)! But do not screw it yet!
-
draw the holes on the underside - the table base - according to the plan. Here you should work very conscientiously, because mistakes here will later catch your eye.
-
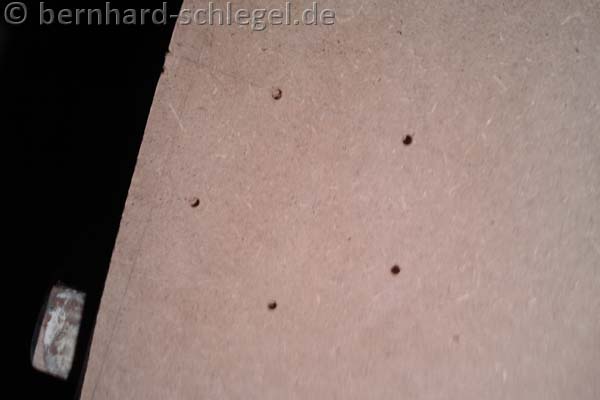
drill through both (!) boards with a thin drill bit (approx. 4-5mm) at the marked points while you are still braced. This way you make sure that the later holes for the cup holders are also concentrically placed on both plates. The diameter of the holes must never exceed the diameter of the guide drill of your hole saw (otherwise it can no longer act as a guide).
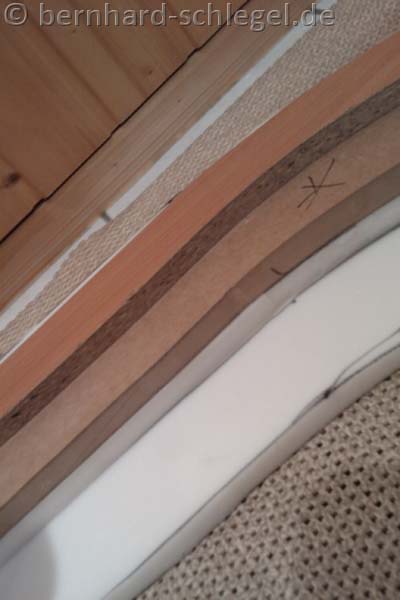
- since my - and probably your - hole saw is not able to saw 2 thick wooden plates at once, the plates have to be separated again.
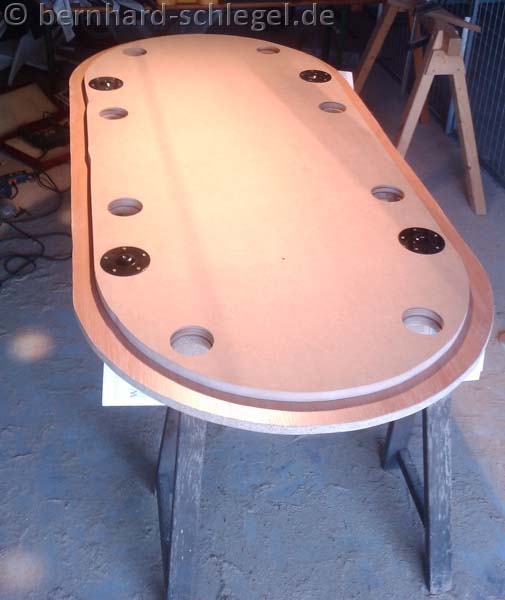
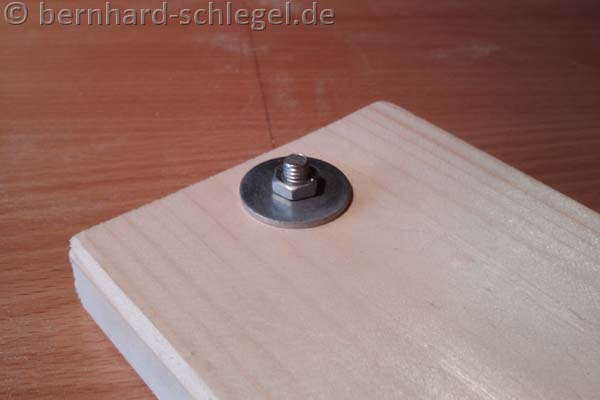
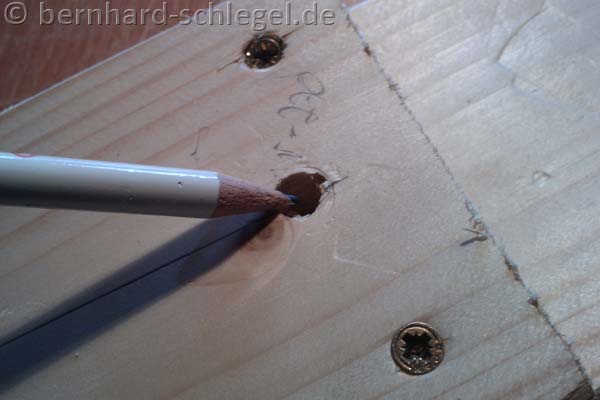
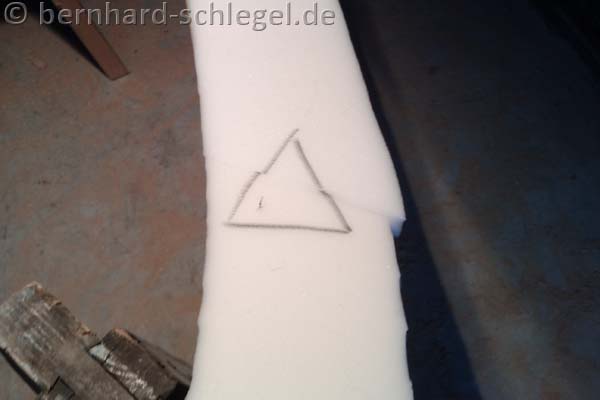
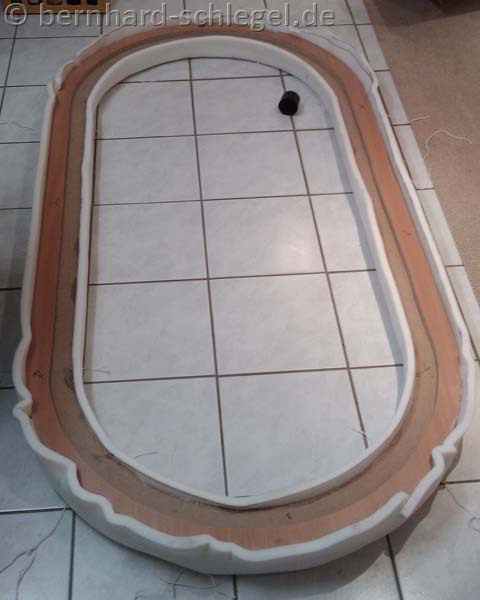
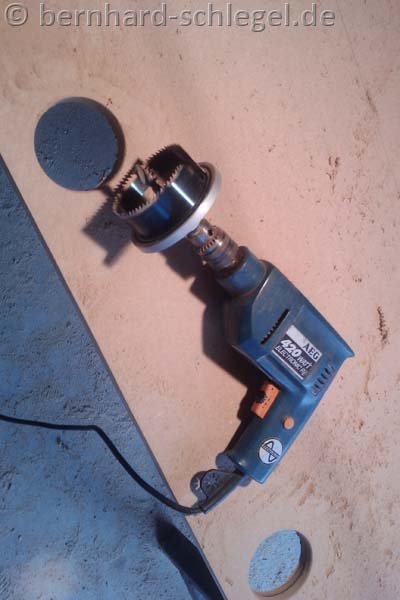
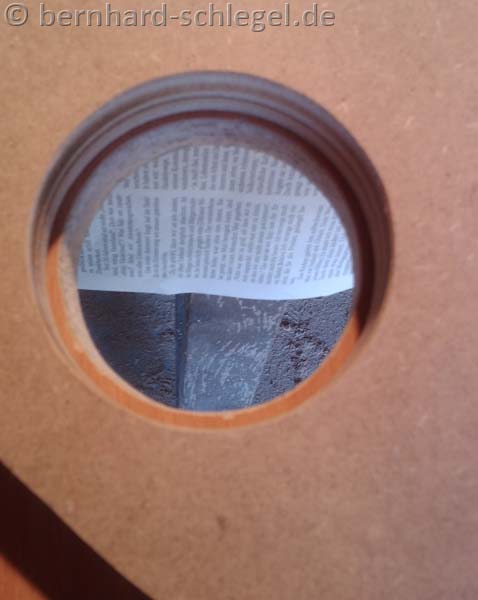
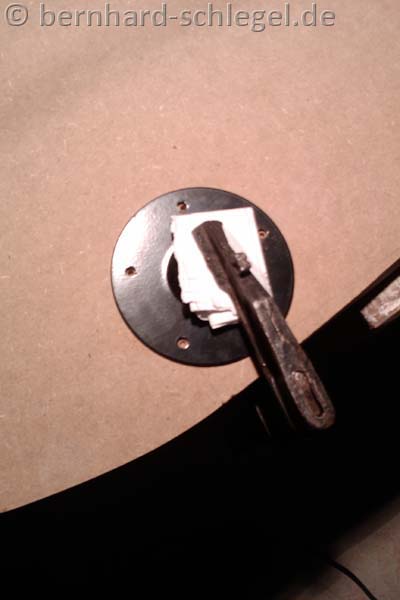
- now you have to get the holes for the cup holders into the two boards. Unfortunately I couldn't find a hole saw with a suitable diameter for my cup holders, so I had to be a bit more complicated. If you have a hole saw that fits exactly to your cupholder, drill your holes and continue with step 6 for everyone else: Since the hole in the table base will not be visible later, nor is it responsible for guiding the cupholder, this hole in the base is drilled with the hole saw, which is "one too big". In other words: The cupholder would not sit tight here. See picture.
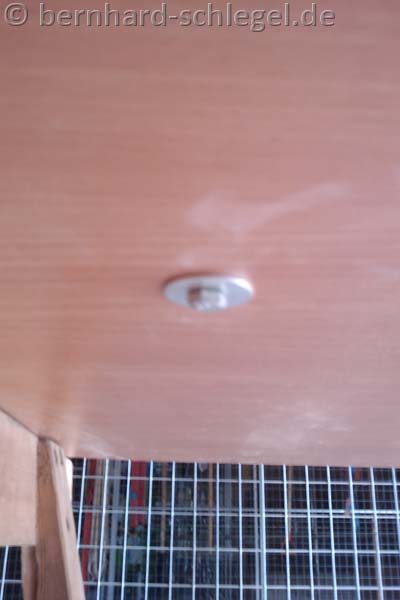
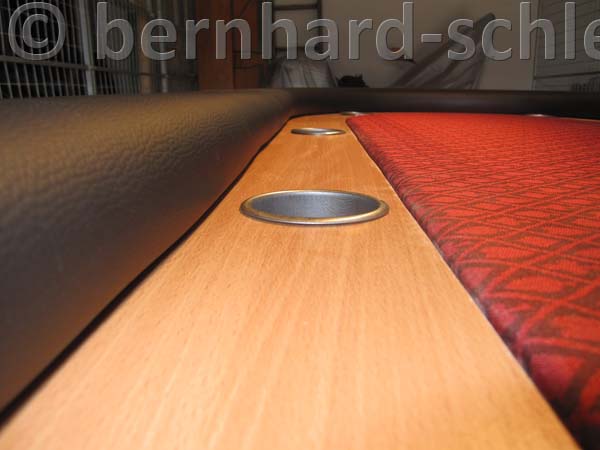
The upper hole (i.e. the hole in the race track) we saw with the hole saw "one size too small" - i.e. here the cup holder does not fit - at least for the beginning. After this hole has been sawn, we now use a fan grinder (see below) to widen the hole to fit exactly (I recommend a press fit, i.e. a tight fit).
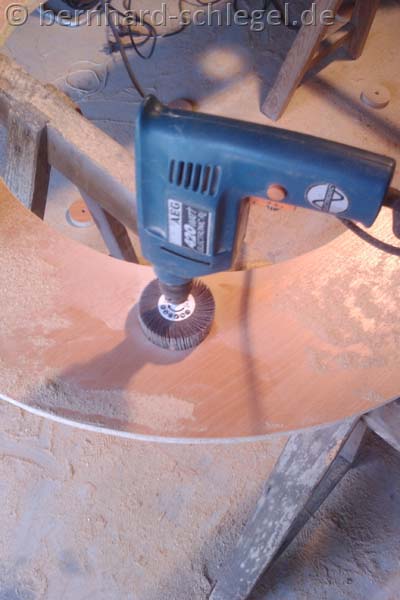
We repeat this procedure, i.e. "Saw the lower hole too large" and "Saw the upper hole too small and then expand it with a fan grinder" for all 8 holes.
- now we align the 2 plates again and fix them properly.

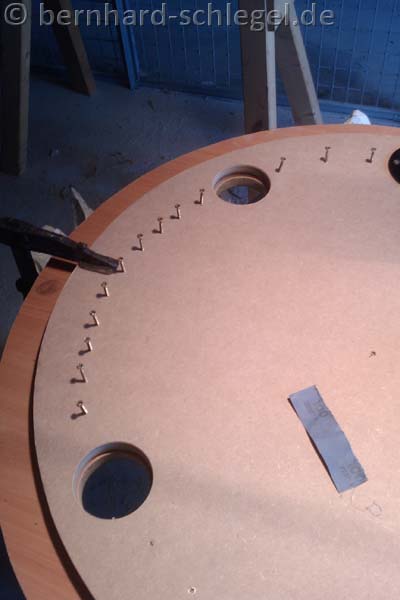
-
aligned, it is now screwed on again, preferably with short pre-drilling. Again, make sure that the screws are as long as possible, but do not stick out on the other side. By the way, you don't need to overdo it with screws as I did - 50 distributed around the circumference should be enough, since no large forces are transmitted here either.
- what is still missing now are the legs. Think about where you would like to have them, or where they disturb the least. Align the holder for the legs, clamp it tight and screw it down - it is best to pre-drill again. Make the screws as long as possible so that they do not stick out on the other side.
Step 8: Assembly!
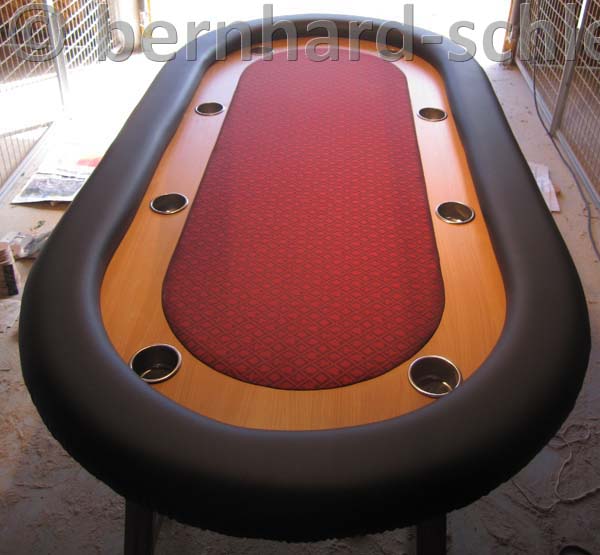
Just put everything together and boom: You're done. Congrats! 🙂
If you like my article and/or you have suggestions for improvement (regarding the poker table/ tutorial/ etc.), I would be happy about a comment!
Apart from that: Have fun with handicrafts and successful poker!
Gallery
At this place I collect pictures of poker tables, which were created because of this tutorial. If you would like to see yours here, you are very welcome to send me a mail!


